Restaurant meals at home
Published 11:55 am Monday, August 23, 2010
When I took my first bite of the delectable banana cake served at Monsoon, I wanted to know how they got it to be so out-of-this-world moist and how they made that killer coconut sauce that complemented it so perfectly. Have you ever thought to yourself how great it would be to make some of your favorite restaurant dishes in your own kitchen, taught to you by the actual chefs who created them? I have. That’s why I’m absolutely over-the-moon in love with “Dining in Seattle: Past & Present.” Thoughtfully written by fellow Islander, Andrea Lott, along with Andrea Umbach and Elliott Wolf, their cookbook is much more than its over 200 priceless recipes. It’s a guide that enables us to recreate memorable dishes from many of Seattle’s best loved restaurants — some from the past and some from the present.
“Dining in Seattle: Past & Present” is a continuation of the very popular series of cookbooks from the 1970s and ’80s called “Dining In,” the innovators of duplicating the restaurant experience at home. Some of the most talented and skilled chefs whom our city has been blessed with have graciously shared recipes of their signature dishes, along with giving us an intimate peek into the history of their restaurants. I love how well this book walks you through the cooking process of each recipe, including over 200 helpful tips to ensure your success no matter what your level of skill is, from novice cook to experienced chef.
Each restaurant contained in the “Present” section of the book offers a specially chosen full-course dinner, including wine pairing and easy-to-understand recipes for each course. Every suggested wine even lists the winery it’s from and is intended to complement each meal to further enhance the dining experience you’re recreating, which I thought was brilliant. After all, dining is not just about eating great food; it’s about savoring a scrumptious taste experience, when each course prepares you for the following one, developed by the perfect blending and balancing of flavors and textures.
I also thoroughly enjoyed how the book includes the history of each restaurant — something we’re rarely privy to. There’s only one restaurant from the “Past” section of the book that hasn’t closed its doors for business: The Georgian Room, in the Four Seasons Hotel, which has been around for an impressive 86 years. Classy, elegant and spectacular in every way, it first opened in 1924 with the Olympic Hotel.
Having grown up in Seattle, it was an enjoyable walk down memory lane for me to revisit some of the popular restaurants from the “Past” and view copies of their original menus. I was reminded of how much time has passed and how our city has been transformed. It was astonishing to read that Brasserie Pitsbourg’s beef bourguignon (beef morsels braised in Burgundy wine with freshly sautéed mushrooms) had cost $9.75. Keep in mind: that was decades ago, when even desserts at a top French restaurant averaged $1.50 and coffee was a mere third of that.
We’re all aware that dining out is expensive and considered a luxury for most of us, especially in our current, stressed economy. What a great time to get creative. I thought about how fun it would be to put a group together where each guest or couple prepares one course on a particular menu: a sophisticated and dressed-up version of a potluck. Here are a couple of scrumptious recipes that I chose from the book.
Dahlia Lounge’s Chive and Dill Dungeness Crab Cakes with Mixed Lettuces, Olive Oil, Lemon and Sea Salt
Panko is the name for Japanese bread crumbs, which are coarser than regular bread crumbs and stay nice and crisp when fried. Look for panko in supermarkets (check the seafood department or Asian section)
½ pound Dungeness crab meat, drained, picked through to remove any shell fragments and lightly squeezed dry (see tip)
5 tablespoons mayonnaise
1 tablespoon plus 1 teaspoon lemon zest, grated
1 tablespoon plus 1 teaspoon fresh dill, minced
1 tablespoon plus 1 teaspoon chives, thinly sliced
¼ teaspoon kosher salt
1/8 teaspoon freshly ground pepper
1¼ cups panko
2½ tablespoons unsalted butter
6 lemon wedges, as a garnish
6 dill sprigs, as a garnish
TIP: Dungeness crabmeat tends to be quite wet. Drain crabmeat in a sieve and gently squeeze the crabmeat with your hands to remove excess liquid. At the same time, feel for any bits of cartilage or shell and remove them as well.
Put the crabmeat, mayonnaise, lemon zest, dill, chives, salt and pepper in a large bowl. Gently mix everything together with a rubber spatula. Add ¼ cup of the panko and mix again. Pour the remaining cup of panko into a shallow container for dredging. (My own little tip here is to start with ½ cup of panko for dredging and have the other ½ cup handy if you need more. I didn’t use the entire cup, even with thoroughly coating the cakes.)
Form the crab mixture into 6 small cakes, each about 1½ inches in diameter. Gently pat the cakes into shape without pressing too hard. Drop the cakes into the panko and turn to coat both sides, patting off any excess panko. If possible, refrigerate the crab cakes at least one hour before frying.
When you are ready to cook the crab cakes, preheat the oven to 450 degrees. Place a large, nonstick pan over medium-high heat and add butter. As soon as the butter melts, add the crab cakes. Leave the pan on the burner for a minute or slightly less (the butter should not start to brown), then place the pan in the oven. Cook the crab cakes until they are heated through and golden brown on both sides, about 10 minutes, carefully turning them with a spatula after about 5 minutes. Remove the pan from the oven.
TIP: If you want the best crust, turn your crab cakes once while they’re in the oven, but otherwise don’t disturb them.
Mixed Lettuces with Olive Oil, Lemon and Sea Salt
2 tablespoons freshly squeezed lemon juice
1/3 cup extra virgin olive oil
Sea salt and freshly ground pepper
6-8 cups small lettuce leaves, washed and dried
To make the vinaigrette, whisk the lemon juice and olive oil in a small bowl, and season to taste with salt and pepper. Put lettuce leaves in a large bowl. Add enough vinaigrette to lightly coat lettuce leaves and toss. (You may not need all of the vinaigrette.) Then season to taste with salt and pepper.
TIP: Don’t dress the salad until right before you are ready to serve..
Assembly:
Carefully place a mound of salad on each plate. Transfer the crab cake to a plate, leaning it up against the mound of salad. Garnish with a lemon wedge and dill sprig. Serve immediately.
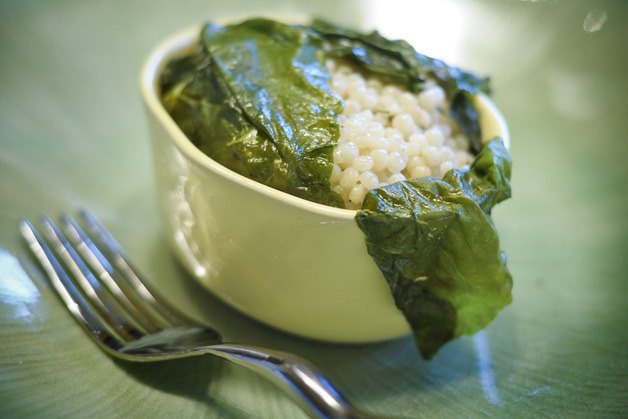
Canlis’ Herbed Israeli Couscous
2 cups Israeli couscous
2 tablespoons olive oil
2 teaspoons garlic, minced
4 tablespoons unsalted butter, plus more for couscous cup assembly
¾ cup dry white wine
2½ cups water
1 bay leaf 1 teaspoon fresh parsley, minced
1 teaspoon fresh thyme, minced
1 teaspoon fresh rosemary, minced
Salt and freshly ground black pepper
4 large Swiss chard leaves
¼ cup Oregon blue cheese, crumbled
TIP: Toasting the couscous will help develop color and flavor, but beware not to do it over high heat because it will burn.
In a large pan, sauté the couscous in olive oil over medium heat for 2-3 minutes or until it begins to brown. Add garlic and butter to perfume the couscous, allowing the butter to brown slightly and the oils in the garlic to release. Add wine and heat for 2-3 minutes to cook off the alcohol. Add water and a bay leaf, and bring to a boil. Reduce to a simmer, cover and simmer for 15 minutes. Remove from the heat and cool. Mix the couscous with thyme, parsley and rosemary. Season with salt and pepper, and set aside.
Blanch Swiss chard in a pot of salted water for about 2 minutes and cool in an ice bath.
TIP: Blanching means to plunge foods into boiling water for a few seconds or a few minutes, then remove and place in ice water. This process sets the color of vegetables, lets you easily peel fruits, and slip the skins off nuts. The food does not cool all the way through, so crisp texture is preserved.
Cut the Swiss chard leaves in half, lengthwise, removing the vein to make eight segments of chard. Set aside. Crumble the blue cheese and set aside.
Couscous Cup Assembly
Preheat the oven to 400 degrees. Butter the sides and bottom of four 4-ounce ramekins. In the first ramekin, place a strip of chard in the ramekin, rib side up. Place a second strip crosswise, ensuring that the inside of the ramekin is completely covered. Fill the ramekin halfway with the couscous mixture. Place 1 tablespoon of blue cheese in the ramekin and cover to the top with more couscous. Finish the packet by closing the four ends of the chard and painting the top with softened butter. Repeat with the three other ramekins. Bake the couscous cups for 15 minutes. For easy handling, place the ramekins on a rimmed baking sheet when baking. Keep them warm until ready to use.
Enjoy!
Cynthia Shifrin can be reached at cyns0117@aol.com or (206) 232-3722.